10 Dec
A couple of months ago, I wrote about Lena’s kibbeh and I gave a recipe for the kibbeh itself, and just described how Lena made the stuffing — Lena does not give out recipes, not because she is not willing to share (she is extremely generous) but because she doesn’t believe in them. Then, a reader posted a comment asking for the onion and meat filling which I had mentioned. I was about to post it as an addition, then I thought that instead of posting it alone, I would do a full post on kibbeh bil-saniyeh which I have been making often recently — it’s been my dinner party mainstay for the last few months.
There are a hundred and one way of preparing kibbeh. Possibly more. I could write a whole book about kibbeh alone. How to make it into balls and either grill or fry these or cook them in yoghurt, or in a sauce made with tahini and seville orange juice, or in sumac juice, or cook them with quince in fresh pomegranate juice. Or how to shape the kibbe into disks which are then filled with spiced tailfat or with labneh (strained yoghurt) and coriander. Or how to make kibbeh into a pie (bil-saniyeh) as in the recipe I give at the end of this post. In fact, I could give many more examples of how to shape and prepare this highly seasoned mixture of minced lamb (and don’t let anyone convince you that it is nicer with beef or veal), burghul and onion. But I won’t. I will just show you how to make kibbeh bil-saniyeh.
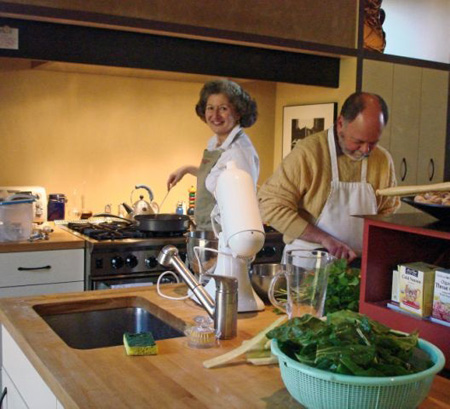
The pictures here were all shot by Aglaia Kremezi, while I was cooking a Lebanese dinner at a friends’s house in Napa. Also cooking with me were Janet and Doug Fletcher who you see in the photos.
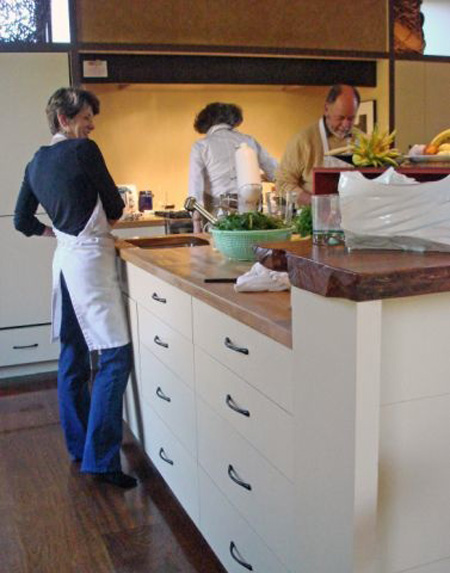
Janet and Doug took care of the shopping too, and more importantly, they took care of grinding the meat for the kibbeh, very fine and very lean for the kibbeh itself and slightly coarser for the stuffing.
So, we got to work. I was in charge of making the kibbeh, Janet of making the pumpkin dip which I had learned from my friend Reem Kelani, the wonderful Palestinian singer (you can read about my cooking with her here and see a lovely picture of the dip) while Aglaia was in charge of making the Swiss Chard fatayer, helped by the “Pastry Princess”, Lissa Doumani — we were at her father’s (Carl) wonderful house where he lives with lovely Pam Hunter.
I started by making the stuffing, then mixed the kibbeh, then set about making the pie, trying to spread the kibbeh as thinly as possible, something I learned from my mother and grandmother while Lissa and Carl make it thicker in their family. We couldn’t find a round baking dish which is the traditional shape so we settled on the rectangular dish below. I spread the bottom layer, covered it with the stuffing and then set about covering the stuffing with another layer of kibbeh. The top layer is a little trickier, it being laid over the textured stuffing.
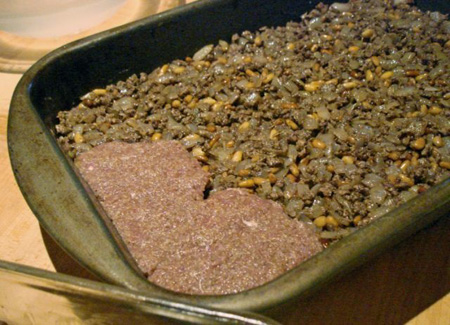
It is always best to start in one corner and to slightly overlap the layers of kibbeh so that you don’t have cracks at the end. And you need to make sure you have even layers of both kibbeh and stuffing.
 .
.
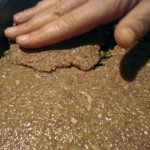
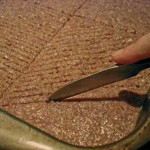
You also need to wet your hands in a little salted water every now and then to make it easier to work the meat mixture. You can see how thinly the kibbeh needs to be in the first picture. And once you finish making the pie, you need to decorate it. My decoration is rather intricate, with each quarter cut in a different, rather tight pattern while Lissa’s and Carl’s family decorate the pie with lozenges all over. Not bad but not as pretty as my handiwork, if I may say so myself. And once the kibbeh is out of the oven, it is a good idea to let it rest for a few minutes before cutting it so that it doesn’t fall apart.
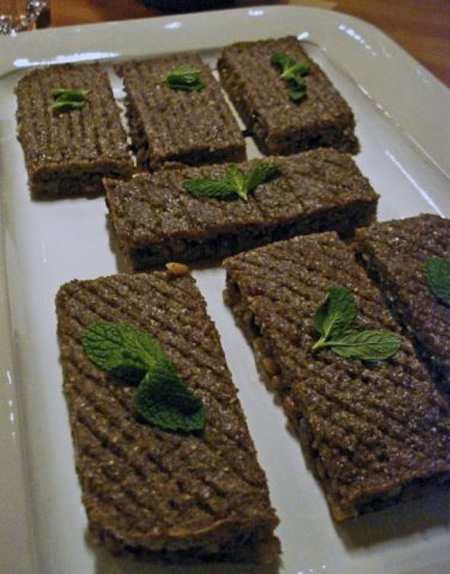
Kibbeh bil-Saniyeh
My London butcher is used now to my eccentric request for a leg of lamb, which he has to bone, skin, defat and, the ultimate crime, put through a fine mincer. If there are other customers waiting, I have to first apologize for monopolising the butcher’s time, then I feel compelled to explain that the meat is not being misused but on the contrary prepared for one of our most renowned national dishes. Serves 4 to 6
for the stuffing
60 g (2 oz) unsalted butter
60 g (2 oz) pine nuts
500 g (1 lb 1 oz) large onions, finely chopped
200 g (7 oz) lean minced lamb 2 teaspoons ground cinnamon
2 teaspoons ground allspice
1/2 teaspoon finely ground black pepper
sea salt
for the kibbeh
1 medium onion, peeled and quartered
500 g (1 lb 1 oz) lamb from the leg, boned, skinned and defatted
200 g (7 oz) fine burghul
2 teaspoons ground cinnamon
2 teaspoons ground allspice
1/2 teaspoon finely ground black pepper
small bowl of lightly salted water
Spread the pine nuts on a non-stick baking sheet and toast in a hot oven for 5 minutes, or until golden brown.
Fry the chopped onion in the butter, until soft and transparent. Add the minced meat and cook – mashing and stirring it with a wooden spoon or fork to separate the meat and stop it from forming lumps – until it loses all traces of pink. Take off the heat, season with cinnamon, allspice, pepper and salt to taste. Stir in the pine nuts. Taste and adjust the seasoning if necessary.
Put the lamb through a fine mincer. You can mince the meat in a blender but you have to be careful not to process it too much. If you do, it will become too smooth and not only lose texture but also be more difficult to shape, especially when you are making kibbeh balls. Before you mince the meat in a blender, cut off and discard as many white chewy ligaments as you can – the blender’s blade will not break these as well as that of the mincer – then drag a serrated knife through the minced meat to catch the last bits of ligament. Wipe the ligaments off the blade and drag the knife through the meat a few more times until you stop picking up sizeable pieces of ligament.
Put the quartered onion in a blender and process until very finely chopped. Add the minced meat, cinnamon, allspice, pepper and salt to taste and blend together until smooth. If your blender is not big enough to take the onion and meat in one go, process them in two equal batches. Prepare a bowl of lightly salted water and have it at hand before putting the meat in a mixing bowl.
Wash the burghul in two or three changes of cold water, drain well and add to the meat. Mix together with your hand, dipping your hand every now and then in the salted water to moisten both your hand and the kibbeh, also adding a little water to the kibbeh to soften it. Knead until you have a smooth mixture, about 3 minutes. Taste and adjust the seasoning if necessary.
Grease a deep baking dish about 30 x 20 cm and 5 cm deep (12 inch x 8 inch and 2 inch deep) with a knob of butter and preheat the oven to 200º C/400º F.
Divide the kibbeh into two equal parts. Moisten your hands in the salted water and pinch off a handful of kibbeh from one piece. Flatten it between your palms, to a thickness of about 1 cm (1/2 inch) and place it on the bottom of the baking dish starting from one edge. Smooth it down evenly with your fingers. Pinch off another handful from the same piece, flatten and lay next to the first piece, slightly overlapping it. Dip your fingers in water and smooth the pieces together until the joint disappears – make sure you connect the kibbeh pieces well together so that they do not come apart during cooking. Continue the above process until you have finished the first half of kibbeh and covered the bottom of the pan. Then go over the whole layer with moistened fingers to even it out.
Spread the stuffing evenly over the layer of kibbeh and lay the other half of kibbeh over the stuffing in the same way as above. You might find the top layer slightly more difficult to do as you will be laying the kibbeh over the loose stuffing instead of the smooth surface of the baking dish but you will soon get the hang of it.
Cut the pie into quarters, then with a knife make shallow incisions to draw a geometric pattern across the top of each quarter (see photos). The decoration work is time consuming and can be omitted without affecting the taste, although the presentation will lose its attractive traditional look. After you finish decorating the pie make a hole in the middle with your finger, put a knob of butter over the hole and one over each quarter. Insert a round pointed knife between the edge of the pie and the side of the pan and slide it all along the pie to detach the meat from the sides.
©anissa helou from Lebanese Cuisine
6 Dec
So, my trip to the US has come to an end. I am happy to be home although I am already missing the sunshine of the Bay Area and LA and the bustling streets of NYC. It has been a great trip. The World of Flavors conference was wonderful, my road trip to LA divine and my innumerable meals in restaurants and at friends totally delicious, except for one or two disappointments, including a dinner at Saison which I was looking forward to but it failed to live up to expectations. Still, one or two indifferent meals out of more than 30 (the other was at Tacubaya) is a low percentage. And to cap a very successful trip, I discovered a new foodstuff.
Shortly after WOF, I went back up to Napa to hang out with my wonderful friend Toni Sagakuchi who teaches at the CIA and as I sat in her drawing room, I became fascinated by what I thought was a decorative installation. Lots of funny, dark wrinkly objects hanging indvidually next to each other on a rack — the picture below is of another installation made by her charming husband, Chad, at the Hess winery where he is the chef.
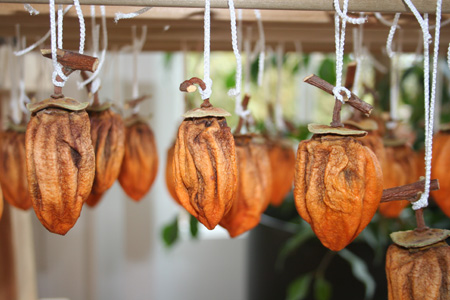
Toni is originally Japanese and the installation had a Japanesy feel to it although it didn’t quite look inanimate, not that the objects were moving but they didn’t look plastic either. I kept looking at them wondering what they were until it hit me that they were edible, hung there to dry. And as I looked more closely, I realised they were persimmons or khaki as they are known both in Japan and in Lebanon. We were in full khaki season and I had also been eating them both in Lebanon and Syria (where they serve them in restaurants with clotted cream at the end of the meal).
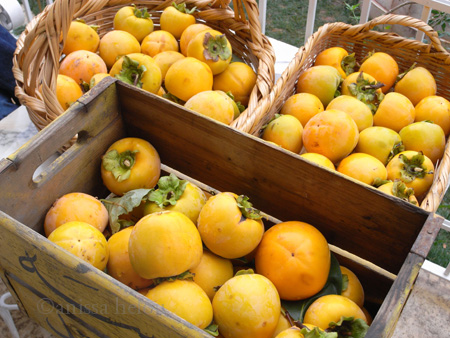
Here is a shot of a friend’s harvest in Ain Zhalta in the Lebanese mountains and even though the khakis in the pictures go mushy, they are not the ones that are dried.
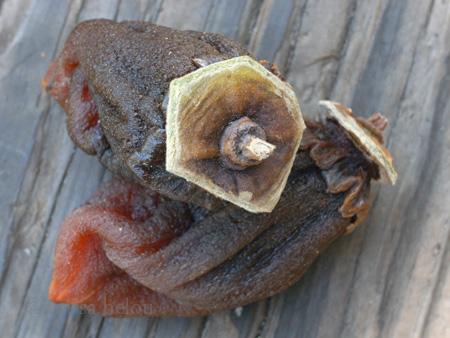
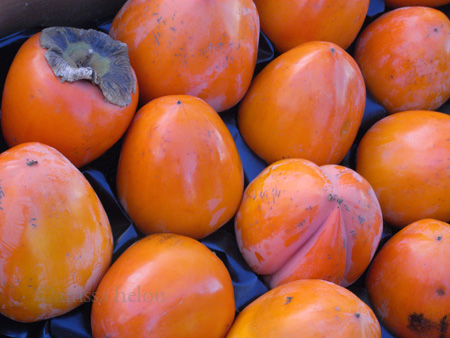
Only the Hachiya persimmons (with a pointed end) in the picture below, taken at the farmers market in Oakland, are dried.
By then, I was very intrigued. I had never seen dried persimmons before, nor had tasted them. So, I asked Toni to tell me about them and she said that she had learned how to dry them from her Japanese parents — drying persimmons is a typical Japanese tradition and the process is delicate and long; each fruit has to be tied and hung individually, and then gently massaged every day. And all the fruit she had hanging in her drawing room had come from a tree in her garden.
At a subsequent dinner with Harold McGee, he told me more about them and sent me this useful link explaining all about the method http://ceplacer.ucdavis.edu/Eat_Local,_Start_Now/Hoshigaki.htm
Toni then gave me some to taste (and some to take away), and it is incredible how flavourful the dried fruit is, and what a lovely texture it has. I am now waiting for the fruit to be covered by a white sugary powder which is the last stage.
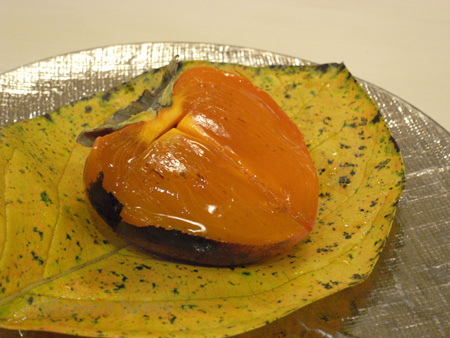
Later in my trip, I was served this exquisite khaki at the end of my meal at Urasawa. Sadly, I was not able to discuss drying them with Hiro, the fabulous chef/owner. The counter was full and it was getting late. It didn’t matter really. What mattered was that the fruit was served at its most perfect stage of ripeness. Not too mushy for it to start losing its flavour, nor under ripe which would have made it dry on the tongue. In fact, my whole dinner at Urasawa was perfect except for the deeply embarassing moment when my card was declined, and not because of lack of funds, just because my banker had decided in all his wisdom to switch these to a fixed deposit account!!
18 Nov
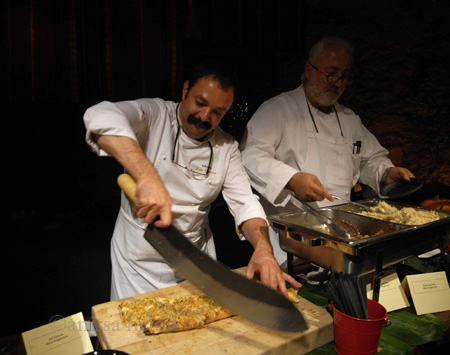
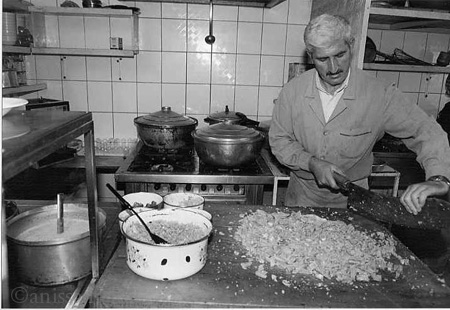
Well, I was going to post about chef Musa’s Adana kebab as a follow up to my previous post on street kebabs in Aleppo but then he brought out his special kebab knife, known as zirh in Turkish, which looks more like a sabre than a knife. It is used to chop meat for kebabs, or tripe for iskembe çorbasi (tripe soup) or the herbs and peppers that are mixed with the meat. Everyone in Turkey will tell you that there is no other way to chop these ingredients — the chopping has to be done by hand to get the right texture, and despite the zirh looking enormous and unwieldy, it is surprisingly easy to use, and as you can imagine, very efficient. So, I thought I’d post a few of the photos I had taken on various trips to Turkey showing the zirh in action .
Here is a black & white one of a tripe soup maker chopping an impressive amount of tripe.
And here are a few which I shot in Gaziantep in the kitchens of Imam Cagdas, with each cook using his zirh to chop meat, herbs or peppers I think. Quite a sight.
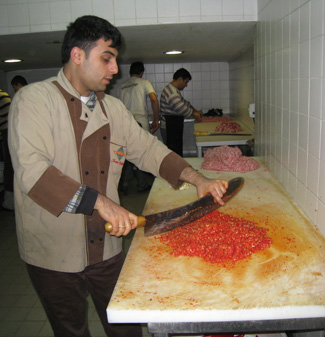
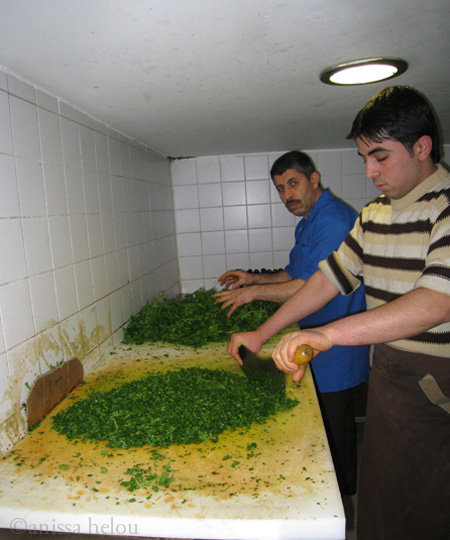
And here is a short, and I’m afraid not very good clip of all of the chefs at Imam Cagdas chopping away.
[vimeo]http://www.vimeo.com/7683754[/vimeo]
And finally, here is one of chef Musa, chef Burak and me in action at WOF which Zeynep, chef Musa’s wife snapped.

And here are two recipes, chef Musa’s Adana kebab and my tripe soup. As for my own zirh, I will post a picture of me using it in London. I can see it becoming an integral part of my demonstrations!
Chef Musa’s Adana Kebab
Yields 4
15 oz (450 g) lamb, shoulder and flank
1/3 oz (10 g) tail fat (from a male lamb)
1 red pepper, finely minced
1 shallot, finely minced
1 tbsp Maras chili pepper
- Using a knife or mezzaluna, mince the lamb and tail fat.
- Put the meat in a bowl. Add finely minced shallots.
- Discard the excess juice of minced red pepper and add in the bowl.
- Add Maras pepper. Mix all the ingredients well.
- Divide this mixture into 4 balls.
- Using wide metal skewers, put the meat onto skewers.
- Grill on oak charcoal.
- Serve on lavash bread.
©Musa Dagdiveren
Tripe Soup
Iskembe Çorbasi
Tripe, both sheep and ox, is a prized meat in most Mediterranean countries. In Italy, Spain and France, it is sold already cleaned and cooked. All you have left to do is dress it at home with your choice of sauce or garnish. However, in Middle Eastern countries, tripe is sold uncooked although, most of the time, already cleaned. You will still need to clean it further at home by washing it in several changes of soap and water. The following recipe comes from Turkey where there are many restaurants and cafés that specialize in tripe soup. A similar version of this soup is also popular in Greece (patsas) and, again, it is consumed early in the morning, after a night’s drinking. However, if you are horrified at the idea of eating offal or variety meats as it is known in the US, you can easily replace the tripe with lamb or chicken. Serves 6
10 ounce (300 g) piece of uncooked sheep’s tripe
sea salt
5 tablespoons (75 g) unsalted butter
1 1/2 tablespoons all-purpose flour
2 egg yolks
juice of half a lemon, or to taste
1 teaspoon Aleppo pepper
6 garlic cloves, crushed
1/2 cup white wine or champagne vinegar
1 – Wash the tripe in several changes of soap and water and rinse well. Put in a large saucepan and add 1 1/2 quarts (1 1/2 litres) water. Place over a medium-high heat, add salt to taste and bring to the boil. As the water comes to the boil, skim the surface clean then cover the pan, lower the heat and simmer for 1 1/2 hours or until tender.
2 – When the tripe is done, remove and slice into thin strips. Strain the stock and set aside.
3 – Melt 3 tablespoons butter in a clean saucepan and stir in the flour. Slowly add the strained tripe stock while continuing to stir. Add the tripe and simmer for another 5 minutes.
4 – Beat the eggs with the lemon juice.
5 – Melt the rest of the butter in a frying pan. Stir in the Aleppo pepper. Add a little of the hot soup liquid to the egg mixture then pour the egg mixture into the soup stirring all the time. Remove from the heat and stir in the garlic and vinegar. Usually the garlic-vinegar mixture is served on the side for people to help themselves but I prefer to mix it all in.
6 – Taste and adjust the seasoning of the soup then pour into a pre-heated tureen and drizzle the flavored butter all over. Serve very hot with good bread.
©anissa helou, from Mediterranean Street Food
12 Nov
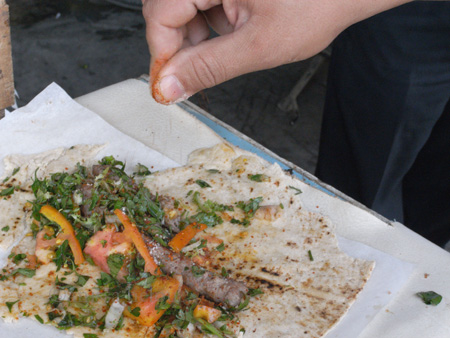
In a few hours, another World of Flavors conference will start at the CIA (Culinary Institute of America). The theme this year is street food and comfort food and as some of you know, I love street food and am constantly on the lookout for fun street food scenes wherever I go, not only to watch but also to taste, if the conditions are right that is. Regardless, I find it hard to resist anything that looks good on the street especially if I am in Aleppo, my favourite city, where you see people eating on the street throughout the enchanting souks.
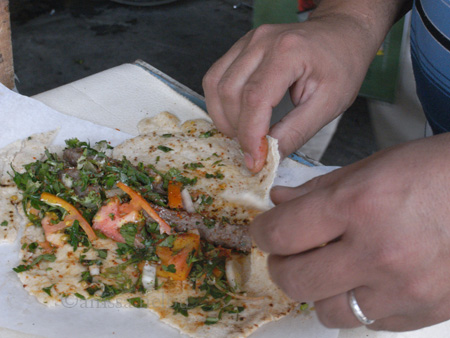
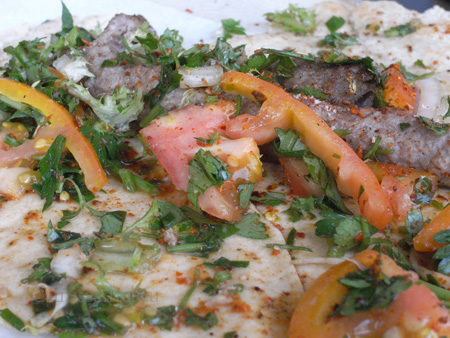
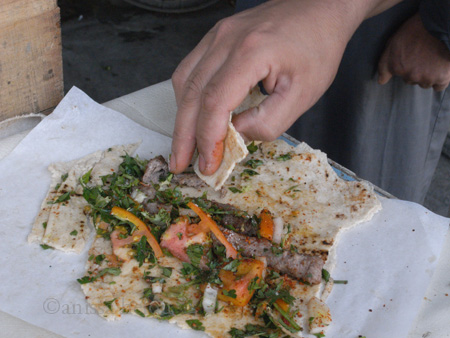
On a recent trip there, I was spoiled for choice. As I walked through the vegetable market opposite Bab Antaki, I came upon a lone gentleman tucking into the best looking kebab I have seen on the street. I asked if I could snap him, or more to the point if I could photograph what he was eating and he was very gracious about my interfering with his meal. Then, right by the Bab, I stopped at an incredibly popular falafel stall where the vendor had piles of fresh mint on the table which his customers picked by the handful to stuff in their mouth with every bite of their sandwich. Sadly, I never got to take any pictures. It was just too crowded. Then there was a vendor I had never seen before who was making kibbeh sandwiches — he announced very proudly that his mother had made the kibbeh. Again no snapshots but this time because the display was not very pretty. But here are a few shots of the delicious kebabs my lone gentleman was eating.
And later this afternoon, I’m hoping to be able to take a few shots of some Adana kebabs being prepared by Chef Musa Dagdeviren from Ciya, together with Chef Necdet Kaygin and Chef Burak Epir which I will post in the next couple of days.
